How-to: Setup AWS-VPN on Windows
Summary
In this article you will learn how to setup Therigy's AWS VPN configuration on Windows -- note: you will need someone from the Service Desk to install the application.
If you have any issues during this process, please contact the Service Desk at:
- support@cps.com
-
1-844-638-1630
Instructions
Step 1: Navigate to https://self-service.clientvpn.amazonaws.com/endpoints/cvpn-endpoint-0882f5d0edb91c041 (If you get a 400 Error, please open the link in an incognito window).
Step 2: Download the Configuration Profile & AWS-VPN Client.

Step 3: Have someone from the Service Desk Team install the AWS VPN application.
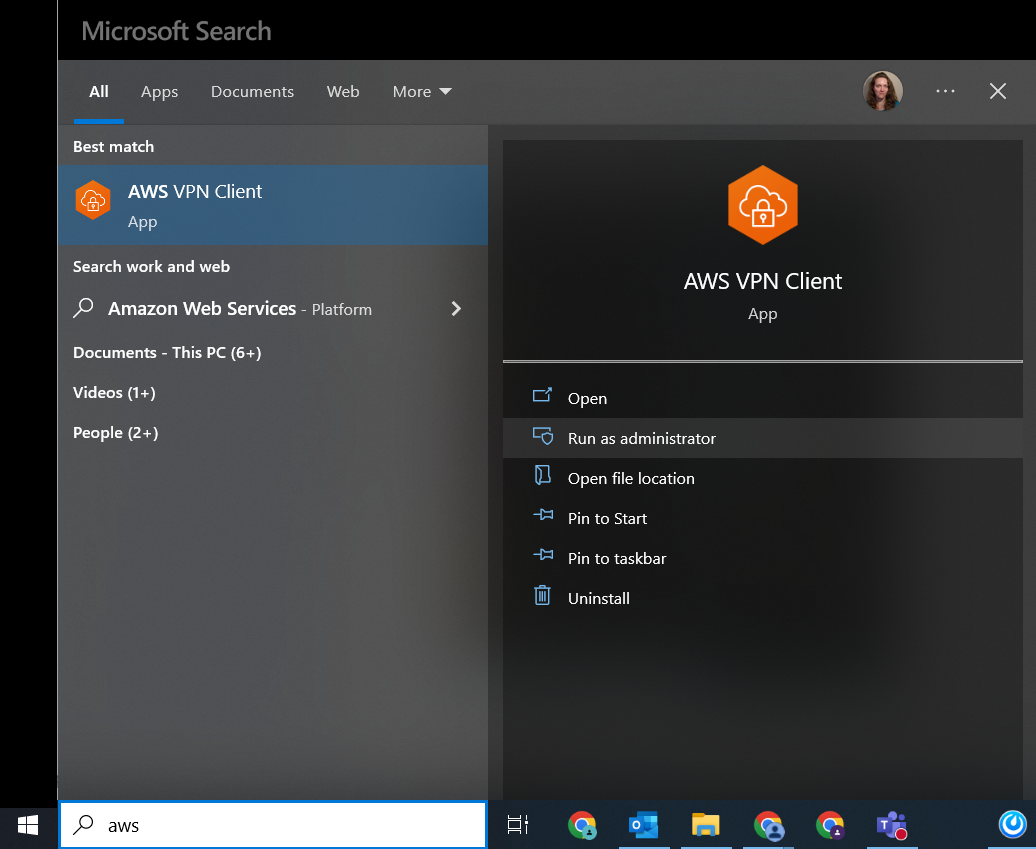
Step 4: Open the AWS VPN Client.
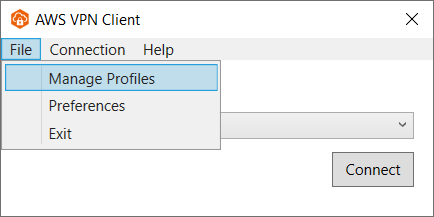
Step 5: On the window that appears, select 'File' then 'Manage Profiles' to add the configuration profile.
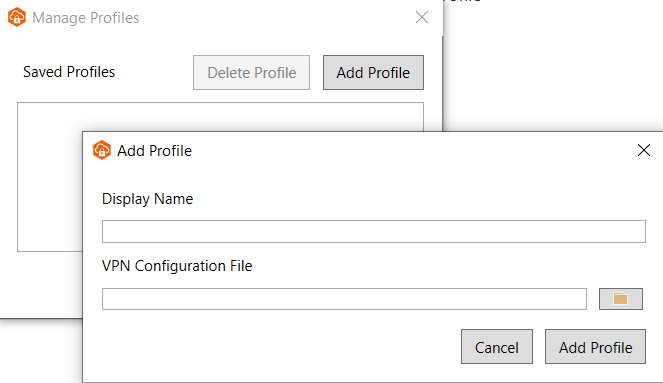
Step 6: Select Add Profile.
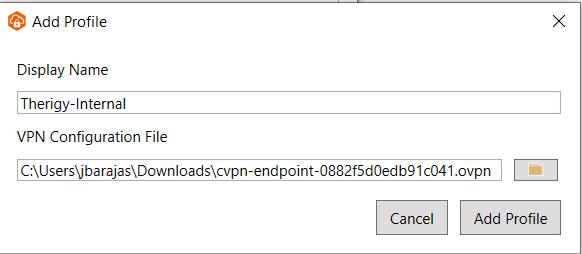
Step 7: For Display Name, type 'Therigy-Internal' then click the folder icon to upload the config file.

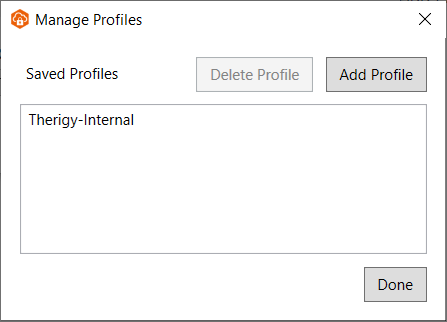
Step 8: You should see something similar to the image below, Click Add Profile.
Step 9: On the next window, Click Done.
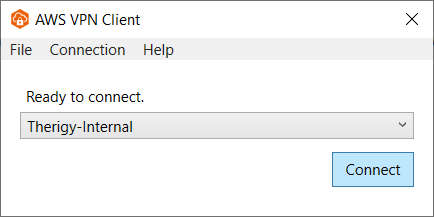
Step 10: On the next window, Click Connect.
Step 11: A browser tab will open and authenticate your Office365 account. You may be prompted to sign into Microsoft, please do so.
Once authenticated, you will see this browser tab window. You can close it.

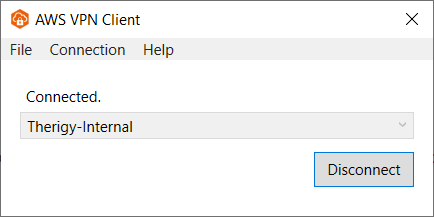
Step 12: Setup complete! Please disconnect from the VPN when not in use.
Conclusion
You have successfully completed setting up the AWS VPN on Windows. If further assistance is needed, please contact the Service Desk.